Monday, 24 September 2012
Beating aliasing.
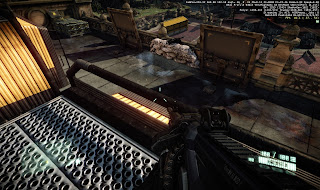
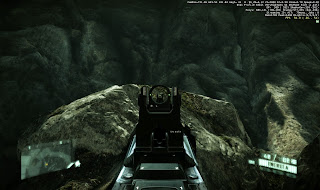
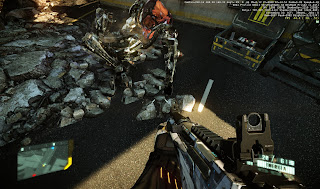
Crysis 2 includes FXAA filter (an old version). In MaLDoHD 3.0 I included a FXAA tweak to improve FXAA sharpness using "FXAA ultra" in the Config Tool. A few months ago, I talked with Jorge Jiménez (SMAA creator) to include the injector in version 4.0 of the mod. SMAA offers very good results. The best results of SMAA in Crysis 2 occur when the in-game FXAA is completely disabled. The problem is that the effect of rain in Crysis 2 is tied to r_postMSAA=1, which activates the FXAA. That is, if you disable FXAA in Crysis 2, the rain disappears. There are three levels (I remember now) where it's raining: Intro (when you leave the submarine), Times Square and City Hall. I don't want to lose rain effect, and I think is a bad idea to ask users to activate FXAA only in those levels through command console.
Last week I discovered the SweetFX injector. It uses Jorge Jimenez SMAA as the basis adding some new effects on top. Thinking about the filters again I took up an old battle, and I decided to spend this weekend to get rain effect while disabling FXAA. And I did it. So now MaLDoHD 4.0 has an amazing image quality using the SMAA injector, with internal FXAA completely disabled and visible rain. This week I will test SweetFX and perhaps replace the SMAA injector. I have to find a good setup because I don't need more sharpness and do not want to modify saturation values because are already slightly modified in my TOD.
Do not worry, this is not the only mod thing I've done this weekend.
Wednesday, 19 September 2012
Walking the final stretch
As I said, I will put more info here for the final part of version 4 development. So you can know how many is each 0.1. I hope there are no complaints about putting too many info XD As you'll see I use to making it less boring opening several fronts and doing several simultaneous tests.
I have a near final version of the textures for the doors of the church. Lack decide whether I get the "mass timetable" into a separate decal to gain some definition in letters without taking up much more memory. As I can make a squared decal I can make it without alpha layer, which would be only 170 KB for a 512x512 resolution, which is far enough for crisp letters. Below you can see the texture of the big and small doors (version with "mass timetable" into the main diffuse). You can notice that the crytek original texture from a real picture preserves a person reflection in the glass. LOL.
For columns of Central Park I had previously done tests using decals. I had take that decision because the ornament is a piece of columns within a texture atlas. An atlas is a big texture that includes smaller textures inside. For example, a texture atlas for texturing a car would be a big picture with the door, front, lights, wheels and steering wheel all crowded together and then use each piece in the share. Using atlas reduce drawcalls. One atlas for diffuse and one for the bumpmapping that could be 10 different textures if you have them independently. You've surely heard of the Rage megatexture as a giant atlas where they put all the textures of the level.
When I want to improve the resolution of a texture that is a portion of an atlas, the first attempt to do using decals (if possible) to paste on the final object without changing the atlas (you can see a perfect example of this on the Warning sign in the Hargreves cryomachine in the last post). This not waste memory multiplying by four the whole atlas that I will not improve. So the first tests were with a decal ornament on the columns. I then added a bump detail layer using my stone bump texture. The problem with it is that it's necessary to paste as many decals as that item is displayed on the map and place them accurately on the surface (and here are 4 ornaments for each column, with dozens of columns). This also triggers the memory, since each decal has its alpha layer for transparency when decal is not a square.
In this case, as Central Park is not a level that has too much variety of textures, I have valued expand the 1024x1024 atlas to 2048x2048 and improve much of the column instead of just the center ornament. The original atlas includes a 1024x1024 alpha layer to use as specular texture. So the atlas has a size of 1.3 MB. If I keep specular texture in the alpha channel, my new 2Kx2K atlas will be 5.4 MB. The first thing then is to get the alpha channel as a separate texture, then I have a 2.7 MB diffuse plus a 680 KB specular. Then I walked around the map looking for lighting conditions, the location of the columns and the low values of specular in the material they use, and concluded that using a 512x512 specular represents no loss in visual quality. So that in the end will be a diffuse atlas of 2.7 MB and a specular atlas of 170 KB.
To make the column first thing I did was look for real pictures of central park columns. Below you can see the two best real pictures I found in google images. From the first I could conclude that there aren't two equal columns in the park, so it was an impossible task to find the original image used for column crytek. So I decided to use the second photo removing the bird's nest, which seemed too quirky element to include it on all columns.
The following is the color change, increase symmetry, eliminate hard shadows, add three layers of dirt and start creating the height map that I will use to make bump map and displacement map (parallax effect). You can see below part of the unfinished process. It's the first test, no bump and no displacement yet.
I also searched photos of leaves to redo the texture of the bushes. In this case, the leaves of the bushes are also part of an atlas that includes textures for various types of vegetation. It is an even worse scenario than columns because these bushes are at all levels. If I decide to improve texture atlas using a new texture to represent only that part, I have to create a new material by changing the tiling values and later assign this material to all the bushes of all levels one by one. A really hard work. In this case, alpha layer can't be extracted, it's required to handle alpha transparency. The only way to reduce size would be using an alpha layer with a single bit of precision. This halves the size of the texture, but generates more obvious aliasing at the edges of the leaves. The final size of the texture can be something like this
Atlas 1024x1024 with full alpha -> 1.3 MB
Atlas HD 2048x2048 with 1bit alpha -> 2.6 MB
Atlas HD 2048x2048 with full alpha -> 5.4 MB
Atlas HD 4096x4096 with 1 bit alpha -> 10.8 MB
Atlas HD 4096x4096 with full alpha -> 21.7 MB
Currently there is no 4096x4096 textures in the whole mod. The only two candidates to use this resolution are the bushes and maple tree leaves. That's why I have left them for last, to test performance in both cases. Screenshots below of individual leaves and some tests using a 2048x2048 with 1 bit alpha (the "worse" option).
Tuesday, 18 September 2012
Percentage system and System requeriments
Requeriments considerations
Before some people take disappointments, I would like to clarify that the mod requirements are quite high. Version 3.0 of the mod was a pretty big optimization compared to the original game, but in 4.0 there are too many improvements and I can't do optimization miracles.
While it is true that by using the 4.0 recommended settings, performance can be higher than in the original game in ultra settings (at least in my computer), the memory usage is higher.
I guess you may have noticed the large number of textures modified, the new improved materials, additional shadows, etc, and that is not free in terms of memory usage.
Currently, there are several points that crash the game on my computer. Lowering the resolution below 1920x1200 I managed to avoid it. Of course, that's not the solution. I want to say my cpu is already very electromigrated and I'm having crashes from time to time so it's difficult to separate the cpu problems and problems because excessive memory usage.
To test the mod I'm using only one 480GTX which has 1.5 GB of VRAM. Before the release there are still many optimizations at several points in some levels and textures. Furthermore, I added a new option "reduced Textures" in the Configurator Tool which allows using the mod with some of the larger textures reduced. I hope that after the release of the mod has some feedback from users with different configurations of graphics memory so I can further refine the reduced texture option.
Percentage system
I want to clarify one more time (I hope it's the last time) how percentage system works. I work with a few documents with pending tasks. I have a file only for pending screenshots of important or "easy to see" changes. Another file is for to-do fixes in levels and it has an individual percentage for each level.
The main file is about textures/materials pending changes and some levels fixes are into this file too.
The percentage I post in blog is global percentage. How is possible that only a 0.1% is too long? That's easy, because each 0.1% implies a lot of changes.
In the regular monthly copy of June, I have 1075 textures and 1051 material definitions. Some of the textures are exact copy of crytek HD textures, others are Crytek HD textures with some modifications and a lot of them are new from scratch textures. All materials have modifications on some way.
Also the number of fixes on each map exceeded 1.000 some time ago. A few of them can have more than 2.000 changes and Crysis 2 have 19 levels. It's easy that global sum is near or exceeded 20.000 fixes/little changes in all the single player campaign.
With those numbers, each 0,1% can be more than 20 modifications including fixes, textures and materials. Now you can understand how long every update is. For example, since last post (99.9%) I have fixed 40 flickering problems in two levels and those are not included in the to-do files because I've discovered them two days ago.
On the remaining tasks, the truth is that they are a very few. Those are the main pending tasks:
- Create new texture to the branches of the trees (maple). I have made many tests and photos but can not find a result that satisfied me. It is one of the textures is costing me most. Right now I have planned a route through the countryside to find better pictures with which to work.
- Create new texture for the walls low shrubs. Similar situation as above.
- Create new texture for columns_B (diff, bump, spec and displacement) in Central Park.
- Finish fourth Precipice Rocks texture (diff, bump, spec and displacement) and use it in some materials.
- Create new texture for Downtown Church doors.
- Fix bumpmap for interior parking walls.
- Finish the last marble texture in Terminal Station level.
- Add casing shells shadows on each decal in CentralStation level.
- Optimize some areas to reduce memory usage.
- Add materials list for "Reduced Tesselation" option.
- Finish reduced textures versions and add list into program.
- End TOD.
- Integrate QMOD.
- Complete final test walktrough in search of forgotten bugs.
- Preparing and uploading files.
It's a lot of work, but compared to what I've left behind is only a small step. I'll show some of the pending task for more accurate percentage representation.
Thank you very much to all who follow the blog regularly.
Thursday, 13 September 2012
Subscribe to:
Comments (Atom)


